
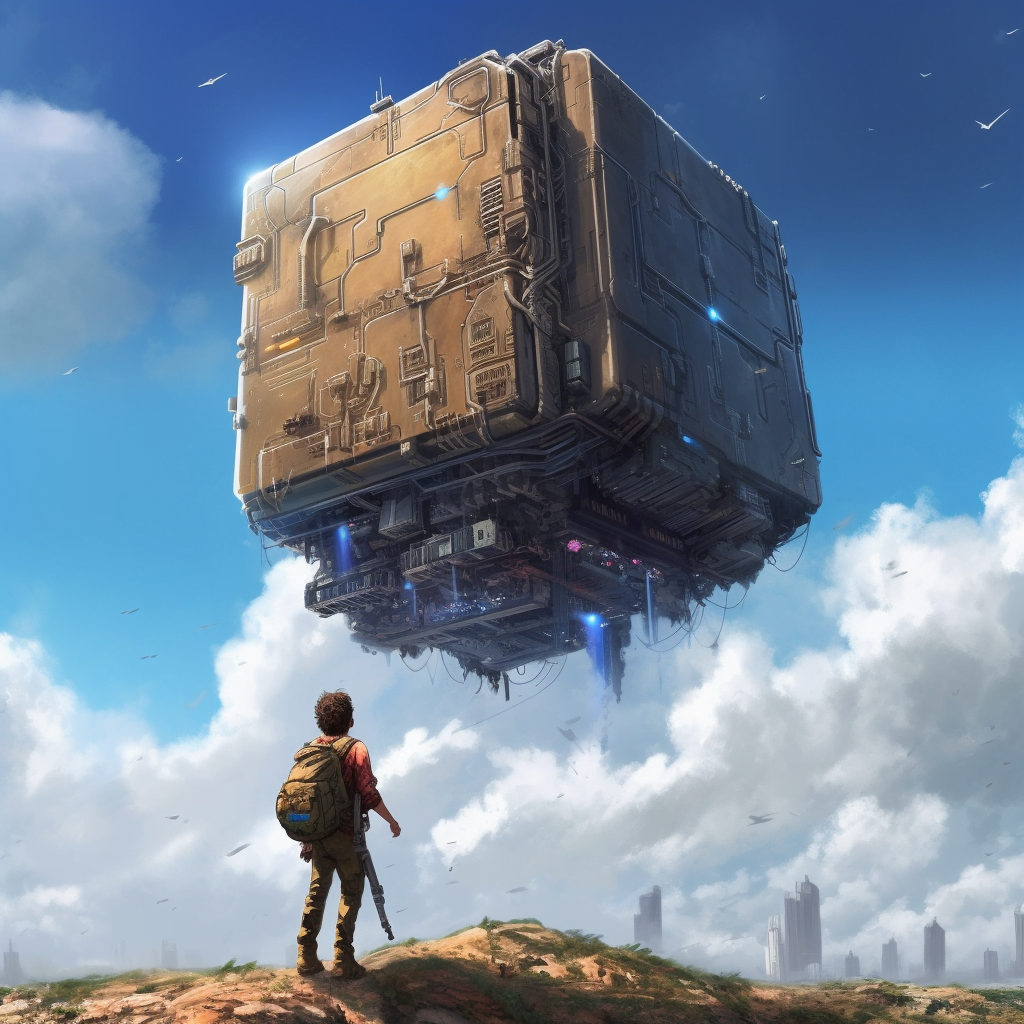
Did you know Midjourney also offers the ability to upload and modify existing images in unique and exciting ways? While it’s a feature that’s not exactly intuitive at first glance, it holds the potential to elevate your creativity and interaction with the platform.
This guide will walk you through the steps of uploading an image to Midjourney, obtaining the image URL, and further enhancing your images by adding descriptive text.
Whether you’re an artist looking to experiment with AI-aided design or simply a Midjourney enthusiast eager to explore more of its features, you’ll find this guide insightful.
So, let’s dive into the details and learn how to harness these fascinating functionalities of Midjourney!
For the main guide behind this topic, visit the parent guide.
How Do I Upload an Image to Midjourney?
Since Midjourney uses Discord, there are a few different ways to upload an image in a format the bot can actually use. It is very picky though, so please follow the instructions carefully!
Here are the steps to upload an image to Midjourney:
Method 1. Drag and Drop:
#1. Launch Discord and locate the Midjourney chat window.
#2. Find the image you want to upload and simply drag and drop it into the chat.
#3. Then press ‘enter’ and wait for it to upload
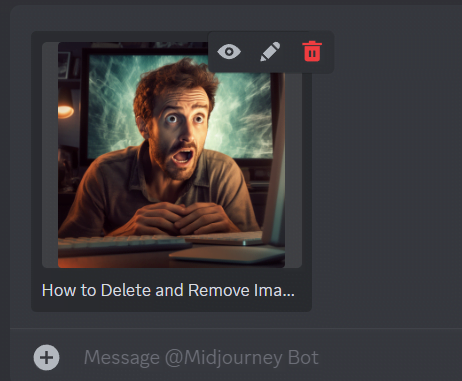
#4. After the image has been uploaded, click on the image once (so it kind of pops up)
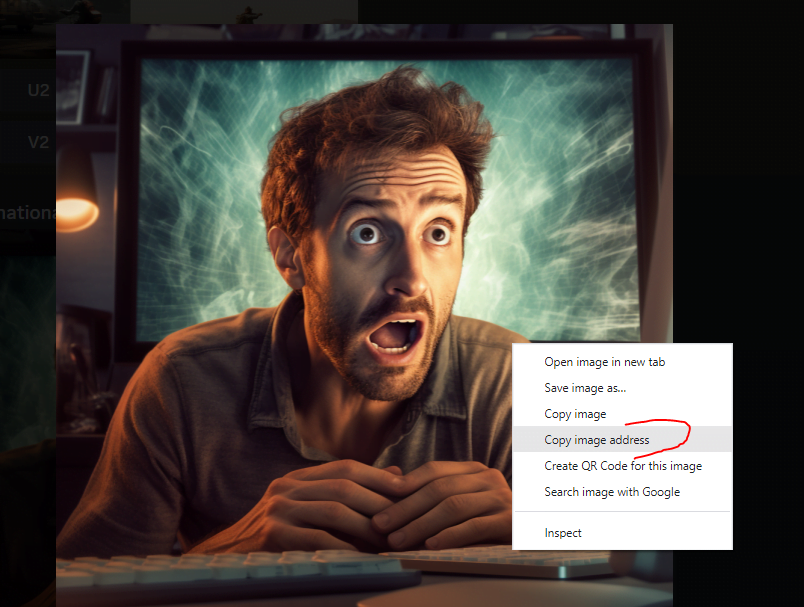
#5. Then right-click and select “Copy Image Address”. This is the URL you want to use with Midjourney for that image.
Method 2. Upload File:
#1. Launch Discord and head over to the MidJourney Bot section (or your DM’s, my preferred method to use Midjourney).
#2. Look for the ‘Upload File’ button and click on it.
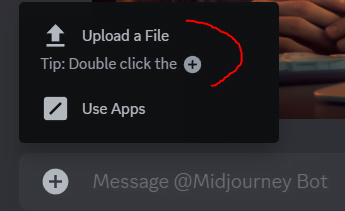
#3. Navigate through your files and select the image you want to upload. Then click ‘Open’.
#4. After the image has been uploaded, click on the image.
#5. Right-click and select “Copy Image Address”.
With your image link ready, you’re set to start the magic!
Method 3. Copy Image Address:
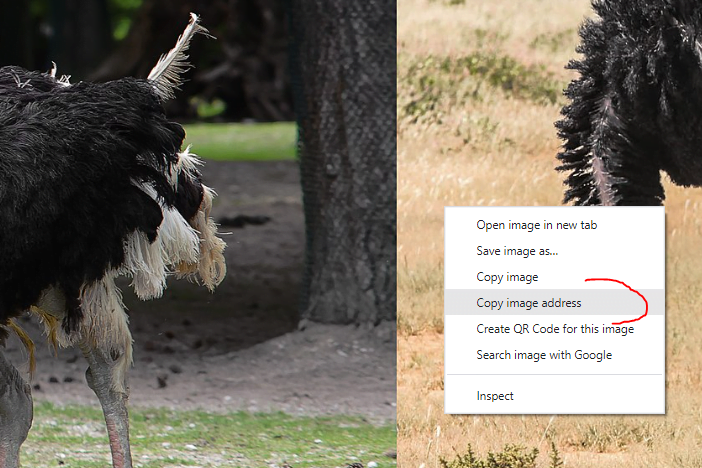
Use this method if you want to take an image from another website, like Wikimedia commons for example.
#1. Find the exact webpage where only the image is located, like this ostrich for example.
#2. Now you should right-click on the picture of the ostriches in Wikipedia and click the “Copy image address” option.
#3. Then go back to Discord and Midjourney and copy paste the address into the bar (don’t use any “/” commands), then press enter.
#4. The image will then be uploaded into Discord after a few seconds and will show as a response when it’s done. (This doesn’t always work if the address isn’t exactly what Midjourney and Discord wants!) Now the next important part, click open the image so it kind of pops up. Then right-click that image and select the “Copy image address” AGAIN.
#5. This is the final image URL you’ll need. Now you’re ready to play around with the ‘/imagine’ command. The URL you paste should start with “media.discord” etc etc, just to know if you’re on the right track.
Important note for all three methods, just make sure you type something (anything!) after this image address and Midjourney should start working on modifying your existing image for you. You can also paste more than one image, too.
How Do I Modify Images Using Midjourney?
Once you’ve uploaded your image, it’s time to modify it. Follow these steps:
- Head back to the Midjourney chat window.
- Start by typing ‘/imagine’ into the chat box.
- Once the prompt box appears, paste your image link into it.
- Add a space after your link and type in a short description of what you want Midjourney to do with your image. For example, “Turn this into a dreamy sunset scene”, or “Give this portrait an oil painting look”. Just make sure you type at least something (even if its a space) or else Midjourney returns an error.
- Press ‘Enter’ and let Midjourney work its magic!
Why Can’t I Get the URL of Images on Safari/Mac?
If you’re using Safari on a Mac and you’re unable to get your image URL, simply follow these steps:
- Upload your image to the chat box in Discord.
- Once uploaded, click on the image to enlarge it.
- Drag the enlarged image to create a new tab.
- Copy the URL of the new tab. This is the direct link to your image that Midjourney requires.
How Do I Add a Text Description to My Image in Midjourney?
Adding a text description to your image in Midjourney is a straightforward process. Follow these steps:
- After you have uploaded your image as a prompt (using the steps outlined above), navigate to the prompt box in the Midjourney chat window.
- Paste the image URL into the prompt box.
- Type in your text description directly after the image URL. Make sure there’s a space between the URL and your text.
Remember, the text description you provide gives context to Midjourney, allowing it to understand what modifications need to be made to your image.
Conclusion
With each new version, Midjourney continues to hone its ability to transform your images into fascinating works of art. While the journey may have its fair share of hiccups, the progress made thus far is nothing short of remarkable. With Version 5.1, Midjourney has stepped up its game, offering improved accuracy and more seamless transformations. Keep in mind, perfection is a journey, not a destination. Midjourney may not always get it right, but with each attempt, it is getting better and more capable.
Happy Midjourneying!
