Most AI image tool comparisons are weirdly unhelpful.
They either drown you in feature soup or pretend there is one perfect tool for everyone. There is not. The best tool for a YouTuber making thumbnails is not automatically the best one for a consultant building lead magnets, a writer making blog visuals, or a coach trying to stop their brand graphics from looking like glossy nonsense.
An AI Image Tool Comparisons Guide for Creators Who Want Better Tools should do one thing well: help you pick based on your actual workflow, not on whoever shouted loudest on X this week. That means looking past hype and asking better questions about output quality, control, speed, editing, consistency, licensing, and how much babysitting the tool needs before it gives you something usable.
Here’s how to compare AI image tools without guessing, without getting seduced by shiny demos, and without paying for three overlapping tools you barely use. If you want a broader hub for this category, you can also browse the main AI image tool comparisons section.
If you want the bigger picture, start with the parent guide.
What creators usually get wrong when comparing AI image tools
The most common mistake is comparing tools as if they all solve the same problem. They don’t.
Some tools are great at fast ideation. Some are better for polished marketing visuals. Some are strong at editing existing images. Some are decent at design workflows because they play nicely with templates, brand kits, and resizing. And some are technically powerful but so fiddly that using them feels like volunteering for admin.
That last part matters more than people admit. A tool is not “better” if it gives amazing results after 45 minutes of prompt massaging, five retries, and a side quest through settings you do not care about.
For most creators, the real question is not “Which AI image tool is the smartest?” It is:
- Which one helps me create useful, on-brand visuals faster?
- Which one fits the kind of content I actually make?
- Which one gives me enough control without becoming a full-time hobby?
- Which one reduces friction instead of adding more tabs and decisions?
If you start there, your comparison gets a lot less messy.
Compare by workflow first, features second
Feature lists look impressive. Workflows tell the truth.
A creator who needs ten simple blog graphics a week has a different standard than someone building high-end campaign visuals or product mockups. If your workflow is light, fast, and repetitive, you should care a lot about ease, consistency, and editing speed. If your workflow is more art-directed, you may care more about composition control, style precision, and image refinement.
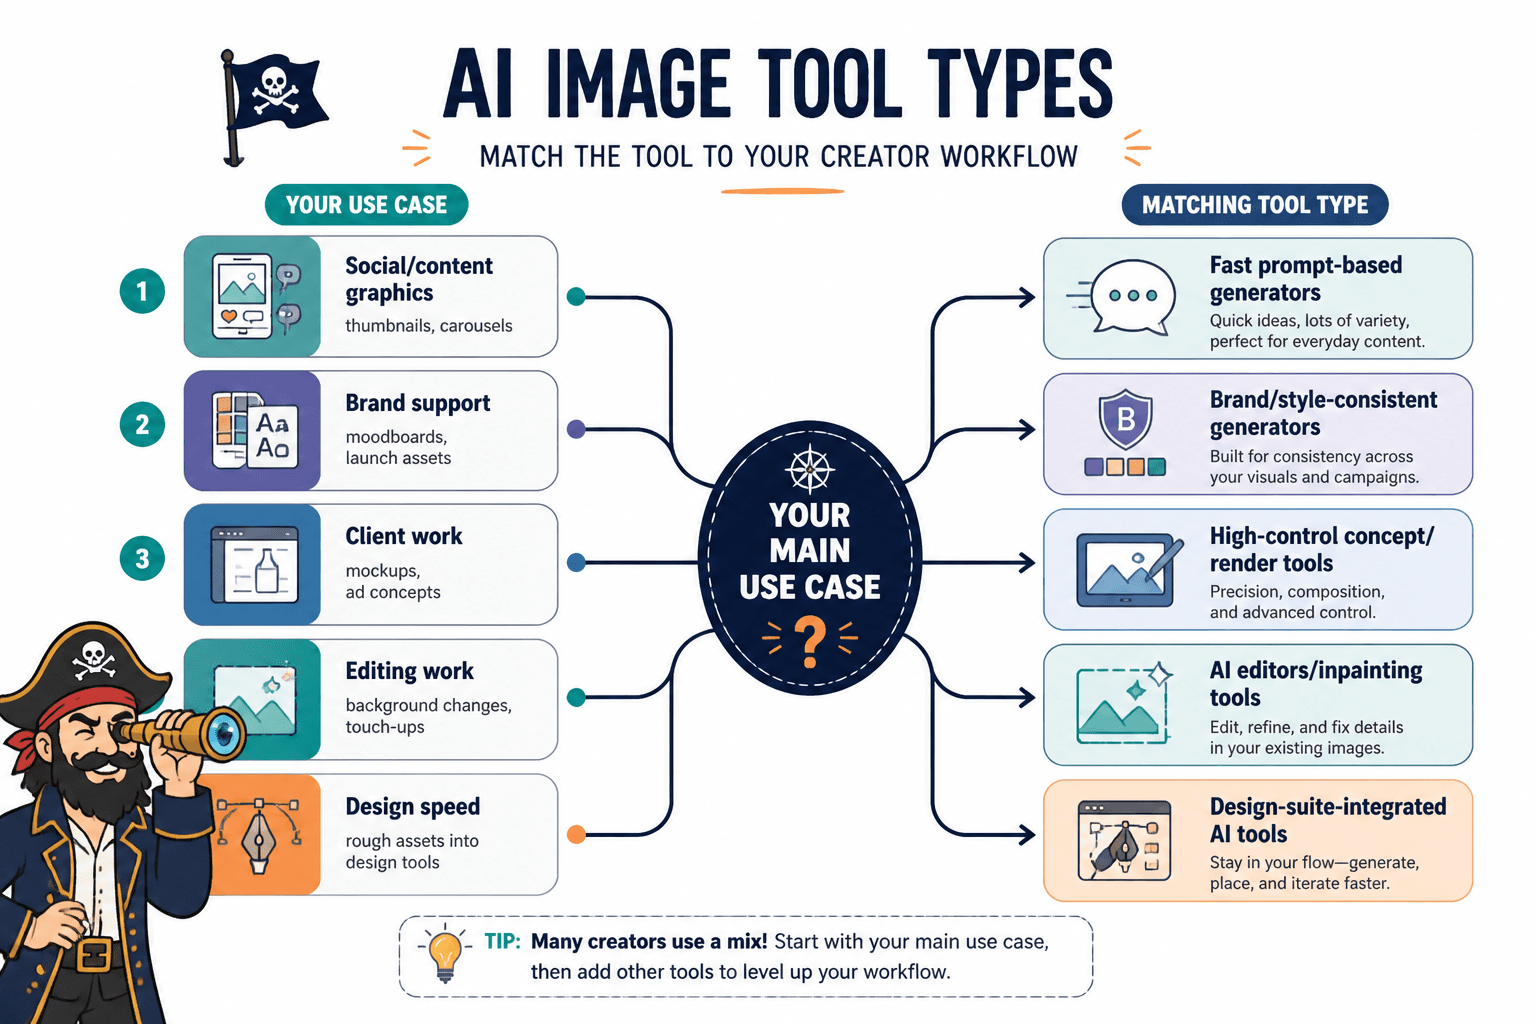
Before comparing any tool, define the jobs you need it to do. Usually, creators fall into one or more of these buckets:
- Content visuals: blog headers, article images, social graphics, thumbnails, carousels
- Brand support: concept images, moodboards, campaign ideas, launch assets
- Client work: mockups, ad concepts, polished presentation visuals
- Editing work: background changes, touch-ups, object replacement, variations
- Design speed: getting rough assets into a broader design tool quickly
If you are unclear on your own use case, every comparison starts sounding smart and ends up being expensive.
For a more structured way to evaluate the field, this guide on how to compare AI image tool comparisons without guessing is worth pairing with this article.
The 7 criteria that actually matter
You do not need a 37-point spreadsheet unless that is your idea of a relaxing afternoon. Most creators can make a solid decision with seven criteria.
1. Output quality
This sounds obvious, but “quality” is not just realism or prettiness.
Look at whether the tool creates images that feel usable for your kind of work. Some tools generate flashy results that fall apart when you need clean hands, readable text areas, believable objects, or brand-safe visuals that do not scream “AI made this in a cave with ring lights.”
Test quality using your real use cases:
- A thumbnail concept
- A blog header
- A professional brand visual
- A social post background
- A product or service mockup
One good fantasy dragon does not mean the tool is useful for your business.
2. Ease of prompting
Some tools are forgiving. Others behave like they want a blood oath and twelve modifiers before they cooperate.
If you need to produce visuals regularly, a forgiving prompt experience matters. You want a tool that can handle clear, normal-language inputs and still produce something close to usable. Prompt sensitivity can be powerful, but it can also waste your time.
3. Editing and refinement
Generation is only half the story. A lot of creator work is really about revision.
Can the tool help you tweak a good image instead of starting over? Can you remove or replace elements, adjust composition, expand the canvas, make variations, or fix details without nuking the whole thing? Tools that handle refinement well usually stay useful longer.
4. Style consistency
Consistency matters if you are building a recognizable brand, a repeatable content format, or client assets that should look like they belong in the same universe.
A tool can be creative and still be annoying if every output looks like it came from a different designer on a different planet.
5. Speed and volume
If you create often, the speed of getting from idea to usable image matters more than the existence of some advanced feature you touch twice a quarter.
Fast previews, quick variations, and efficient export options are not glamorous. They are useful. Big difference.
6. Workflow fit
This is where a lot of “best tool” advice falls apart.
Ask how the tool fits into what you already use. Does it work smoothly with your design process? Can you move images into your article, deck, carousel, or client workflow without friction? Does it support the formats and dimensions you need? A good tool should reduce switching costs, not create more of them.
7. Cost versus real usage
Cheap is not cheap if you barely use it. Expensive is not expensive if it saves you hours every month and improves your output.
The right question is not just “What does it cost?” It is “What am I replacing or speeding up by using this?”
A simple comparison table you can actually use
| Criteria | What to check | Why it matters |
|---|---|---|
| Output quality | Usable images for your real content types | A pretty demo means nothing if your normal use case fails |
| Prompt ease | How much effort it takes to get close | Less prompt wrestling means faster production |
| Editing | Can you refine instead of restart? | Revision speed usually beats raw generation novelty |
| Consistency | Do outputs feel cohesive? | Brand work needs repeatability, not random brilliance |
| Speed | Generation time and iteration flow | Useful for volume and deadlines |
| Workflow fit | Export, dimensions, handoff, design compatibility | Good tools should fit your process, not hijack it |
| Cost value | Price versus actual usage and saved time | Paying for hype is still paying |
Best tool categories for different creator needs
Instead of pretending one tool wins for everyone, it is smarter to compare by category. That gives you a practical shortlist much faster.
For fast content visuals
Look for tools that are easy to prompt, generate quickly, and produce decent-quality images for blog posts, social graphics, and presentation visuals. Editing support matters here because most creators are not using outputs exactly as generated.
Your priorities:
- Speed
- Simple prompting
- Clean composition
- Easy resizing or export
- Reliable output more than artistic range
For polished brand and marketing visuals
You’ll likely care more about image quality, style control, refinement, and consistency. This is where stronger generation models and better editing tools matter more than sheer convenience.
Your priorities:
- Higher-end output quality
- Better control over style and composition
- Refinement tools
- Visual consistency across a series
- Professional-looking results that do not feel disposable
For ideation and moodboards
If you mainly need inspiration, rough concepts, or creative direction, speed and variety matter more than pixel-perfect polish. You want a tool that helps you think, not one that requires a production meeting for every image.
For editing existing images
This is a separate use case and deserves to be treated that way. Some tools are much better at transforming, extending, or cleaning up existing visuals than generating new ones from scratch.
If your work often starts with a base image, screenshot, photo, or previous asset, editing features may matter more than raw image generation quality.
For beginners who hate feature overload
You do not need the most advanced tool. You need one that gives you decent output without making you learn a mini visual-effects curriculum first.
If that is you, this companion piece on AI image tool comparisons for beginners who hate feature overload will probably save you a fair amount of time and irritation.
How to test AI image tools without wasting a week
You do not need a dramatic testing lab. You need a repeatable test set.
Use the same 5 to 7 prompts or tasks across every tool you try. Keep them tied to your actual work. That way, you are comparing outputs, speed, and effort fairly instead of being fooled by random lucky generations.
Try a test pack like this:
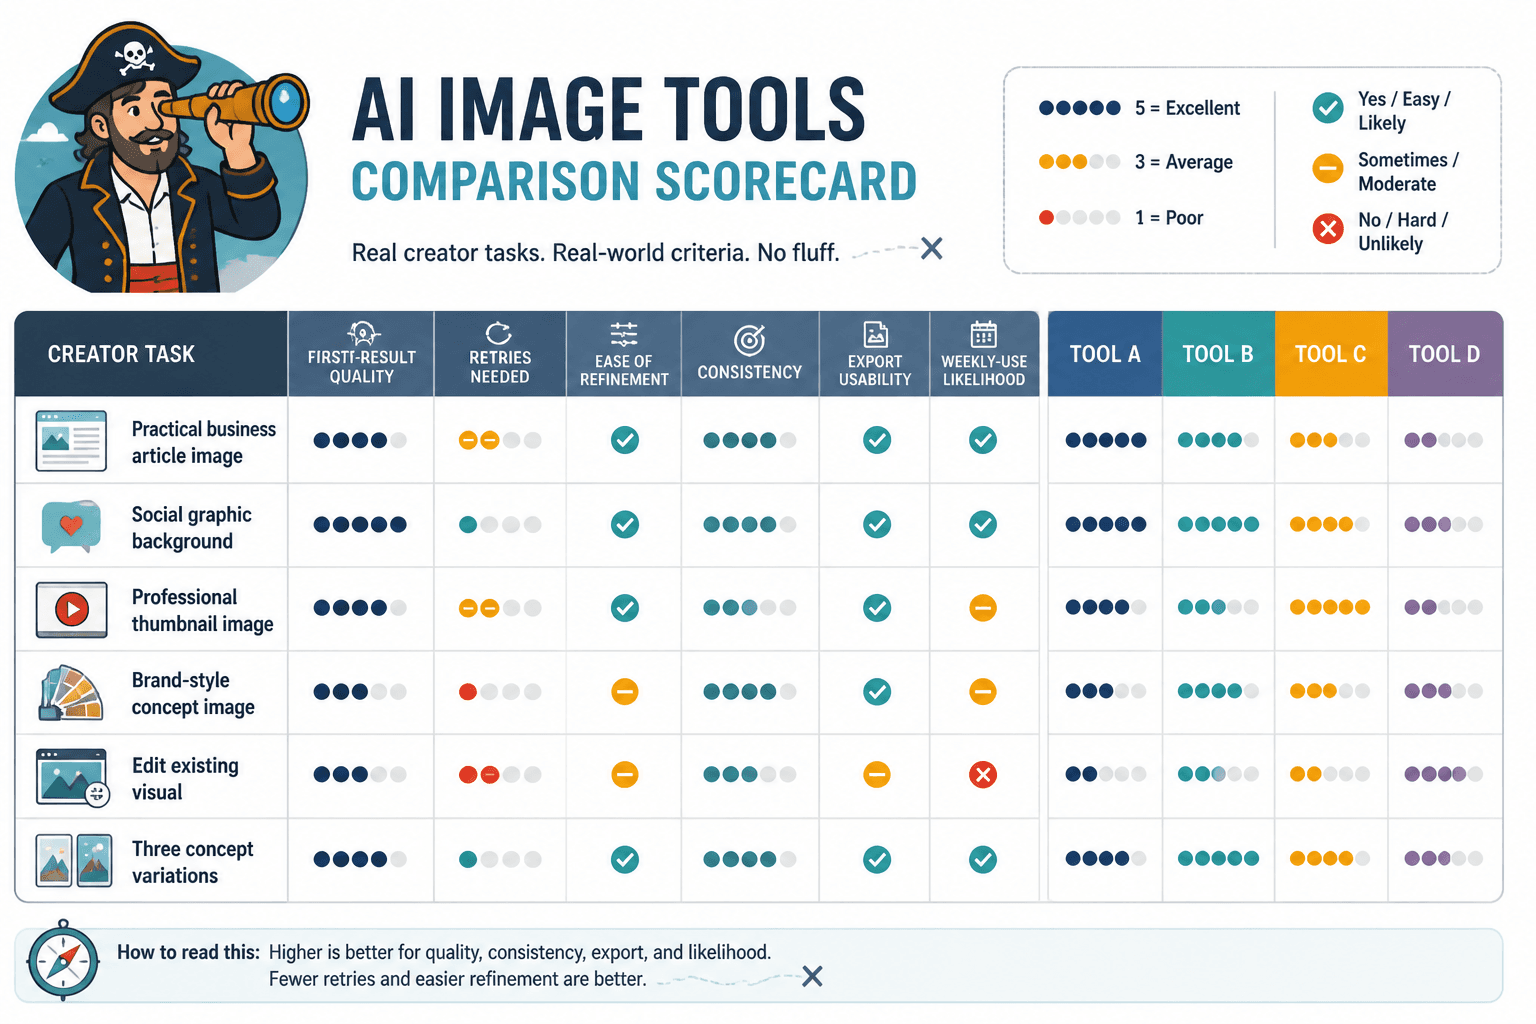
- Create a blog header for a practical business article
- Generate a clean social graphic background with a clear focal area
- Make a professional thumbnail-style image with strong subject emphasis
- Create a brand-style concept image in a specific tone
- Edit an existing visual by replacing or removing one element
- Generate three variations of the same concept
Then score each tool on:
- First-result quality
- How many retries it needed
- How easy it was to refine
- How consistent the outputs felt
- How usable the exports were
- Whether you would realistically use it weekly
That last one is important. A lot of tools are impressive in a demo and oddly absent from your routine a month later.
Red flags that should make you suspicious
Not every tool problem shows up in a homepage demo. A few red flags tend to show up after ten minutes of actual use.
- Too much prompt fragility: tiny wording changes cause wild, unreliable swings
- Strong outputs, weak editing: good first images but no sensible way to improve them
- Inconsistent style: every variation feels like a different creative director took over
- Overdesigned interface: lots of buttons, not much clarity
- Feature inflation: a bloated stack of add-ons masking mediocre core results
- Poor workflow fit: decent generation, annoying export and handoff
- Hype-first positioning: lots of “create anything” language, not much evidence of specific strengths
If a tool looks powerful but routinely creates more friction than progress, that is not a creativity tool. That is an extra chore wearing futuristic branding.
What AI image tools are good for, and what they are not
This part is worth saying plainly because the hype around these tools can get a bit silly.
AI image tools are very good at helping creators move faster. They can help you brainstorm concepts, generate rough or polished visuals, test directions, create supporting assets, and reduce the time between idea and draft. For content-heavy creators, that alone is useful.
What they do not do is replace taste, brand judgment, or audience understanding. They will not magically know what visual style builds trust with your clients. They will not fix a weak message. And they definitely will not save bad content by slapping a glossy image on top of it like a decorative bandage.
The best results usually come from creators who know what they are trying to communicate, have some standard for what “good” looks like, and use the tool as an accelerator rather than a replacement for thinking.
A practical way to choose your tool shortlist
If you want the short version, use this process.
- Step 1: Define your main use case: content visuals, brand visuals, editing, ideation, or client work
- Step 2: Pick your top three criteria: quality, speed, ease, consistency, editing, workflow fit, or cost
- Step 3: Test only 2 to 4 tools in the category that fits those needs
- Step 4: Run the same task set through each
- Step 5: Choose the one you would actually keep using weekly
That last bit is the filter people skip. They choose for theoretical power instead of practical fit, then wonder why they drift back to old tools two weeks later.
If you want more side-by-side examples before deciding, these AI image tool comparison examples for creators who need a clear winner can help you pressure-test your shortlist. And if you want a more curated roundup, this guide to the best AI image tool comparisons for creators who need the right fit is the logical next read.
How this fits into a bigger creator workflow
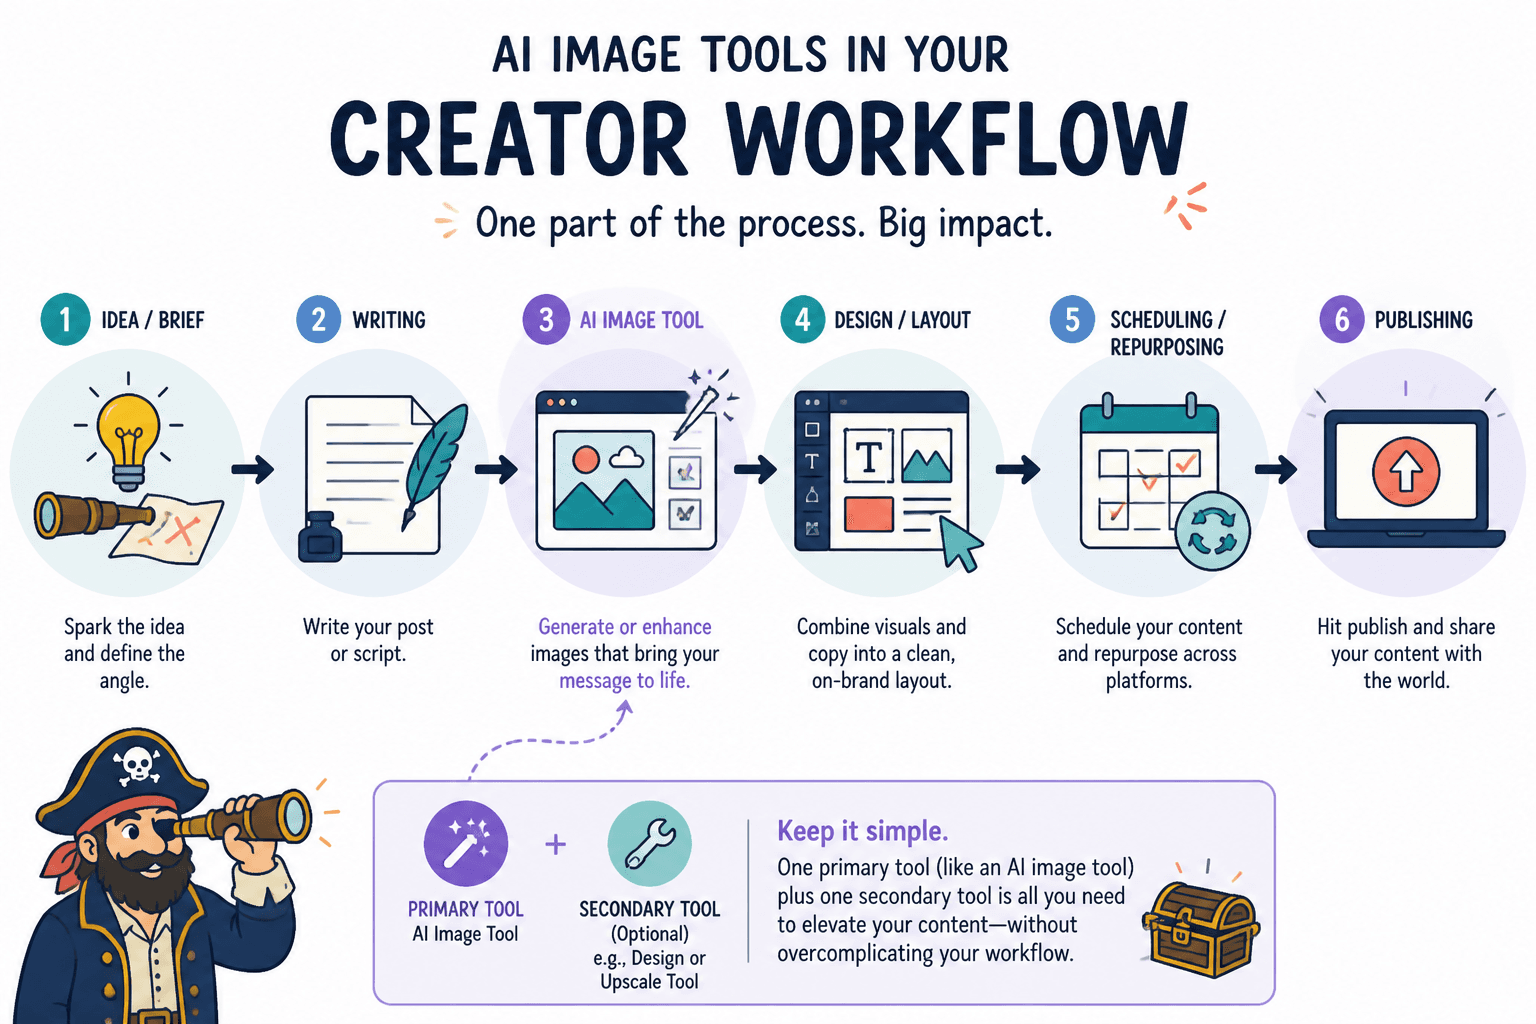
AI image tools are rarely the whole system. They are one layer in a broader content workflow that might include writing, design, scheduling, repurposing, and publishing.
That is why picking the “best” tool in isolation can be misleading. A slightly less impressive tool that fits neatly into your weekly process is often more valuable than the flashy one that produces occasional brilliance and regular annoyance.
If you are building a broader stack, it helps to explore the wider AI writing tools and workflows category path so you can think in systems rather than random subscriptions.
Quick FAQ
How many AI image tools should a creator use?
Usually one primary tool and maybe one secondary tool for a specific edge case like editing or design integration. More than that often turns into clutter.
Should beginners choose the most advanced tool?
No. They should choose the one that gets them usable results with the least friction. Advanced settings are not a personality trait.
Is the most realistic image tool always best?
No. Many creators need useful, consistent, editable visuals more than maximum realism.
Do AI image tools replace designers?
Not in any clean, universal way. They can speed up concepting and asset creation, but strategy, judgment, and refined design still matter a lot.
What is the best way to compare tools quickly?
Run the same 5 to 7 real-world tasks through each tool, then score quality, speed, refinement, consistency, and workflow fit.
Pick the tool that makes your work better, not just more futuristic
The point of an AI Image Tool Comparisons Guide for Creators Who Want Better Tools is not to crown a universal winner. It is to help you make a cleaner decision.
The bigger point is simple: clearer structure and clearer writing make the piece more useful. That is usually what makes the ending land better too.