Are you constantly making updates to your WordPress website, but somehow those changes don’t seem to reflect right away? You may have even found yourself asking: “Why isn’t my website showing the updates I just made?”. If this sounds like you, then this article is your trusty guide.
It’s a common issue, and in most cases, the root cause is the good old website cache. It’s a sneaky little devil that can cause more frustration than you’d think possible.
In this guide, we’ll address this very issue and show you on how to conquer the cache, once and for all!
The process isn’t complicated or technical, so don’t worry, we won’t leave you drowning in a sea of tech jargon. We promise to keep it straightforward and user-friendly, just like WordPress itself.
What does the cache do in WordPress?
Before we dive into the cache-clearing extravaganza, let’s quickly understand what the cache actually does. Think of it as your website’s secret turbo booster.
The cache stores static versions of your web pages, like a snapshot, so that when a user visits your site again, it doesn’t have to retrieve all the information from scratch. It’s like serving a pre-made cake instead of baking a new one each time.
This nifty trick speeds up your website and gives users a smoother browsing experience. For website owners out there, you should note having a fast website is one of the highest ranking factors on Google.
And it makes sense. Who doesn’t love a speedy site, right?
Why do I need to clear the cache in WordPress?
Now, here’s the catch (not cash): If you make changes to your WordPress site, the cache might not automatically update. So, when you eagerly hit that refresh button, nothing changes.
Frustrating, isn’t it?
By clearing, or “flushing,” the cache, you’re essentially saying, “Hey, cache, I need you to catch up and rebuild yourself with the latest updates!”
It’s like giving your website a wake-up call, ensuring that the changes you made are instantly visible to all visitors. Now, don’t panic. No data is lost during this process, but some users might experience slightly slower page loads while the cache is being rebuilt.
It’s a small price to pay for website freshness and a higher Google ranking factor!
How do I clear the cache in WordPress?
Now that we’ve covered the basics, let’s get our hands dirty and learn how to clear the cache in WordPress. First things first, we have potentially three different caches at play here.
Brace yourself, here they come:
- Browser Cache: Your trusty web browser is a caching machine too! To clear the cache for a single page, simply press Ctrl + F5 (or Command + Shift + R for our Mac-loving friends). This forces the browser to fetch a fresh version of the page. Alternatively, you can delve into your browser settings and clear all stored data, including the cache. Remember, this clears the cache on your own device, not for other users.
- Server-Level Caching: Ah, the realm of hosting providers and their mystical server-level caching. Unfortunately, I haven’t won the lottery yet, so I can’t sign up for all the hosting providers to investigate their cache-clearing methods. But fear not! Simply reach out to your hosting provider’s support staff and ask them about clearing the server-level cache. They’ll guide you through the process like knights in shining armor.
- WordPress Cache Plugins: These clever additions to your site can work wonders in optimizing performance. To clear the cache, it all depends on which plugin you’re using. We’ll walk you through the cache-clearing process for the most popular WordPress cache plugins in just a moment.
Which WordPress cache plugin am I using?
Curious about which cache plugin is working its magic on your WordPress site? Head to the plugins section of your WordPress dashboard (~/wp-admin/plugins.php). Once there, embark on a search expedition for the term “cache.” Most cache plugins proudly bear some variation of that word in their name or description.
However, we do have a few rebels in the mix who like to keep things interesting.
Look out for the likes of 10Web Booster, Hummingbird, Swift Performance Lite, and WP Rocket—they’re the “special” ones who don’t include “cache” in their name or description.
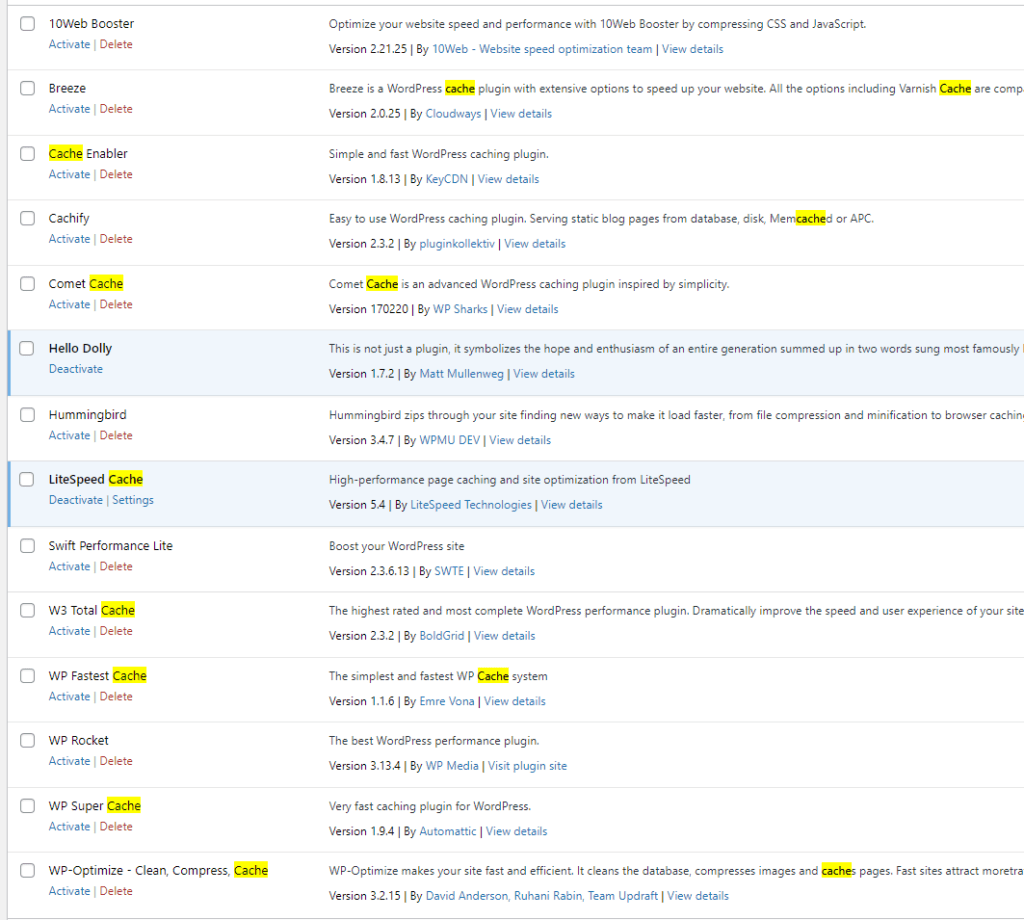
Remember the method to clear the cache will vary depending on the specific plugin you’re using. But don’t worry, we’ll go through all the most popular plugins for cache clearing in WordPress.
How do I clear the cache with 10web Booster plugin?
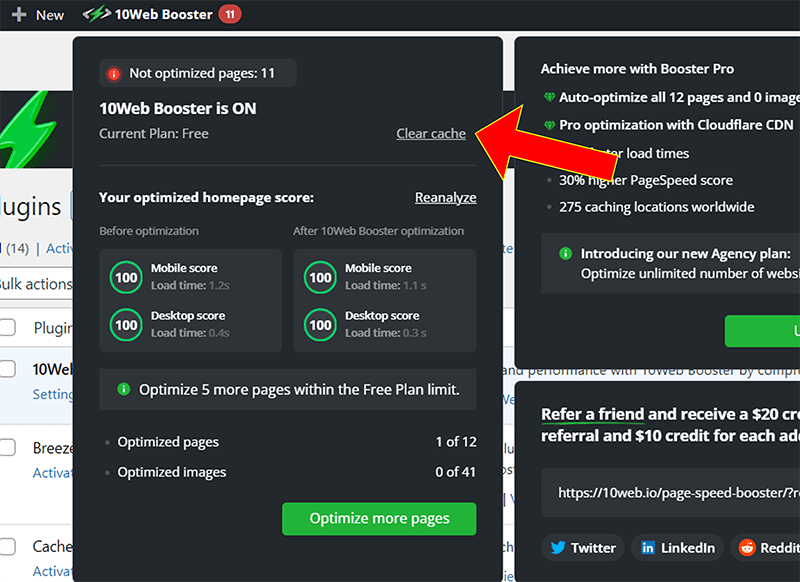
Find the 10Web Booster button located towards the left of the top bar in the WordPress dashboard. To clear the cache, look for the “Clear Cache” button in the left column of their user interface.
How do I clear the cache with Breeze plugin?
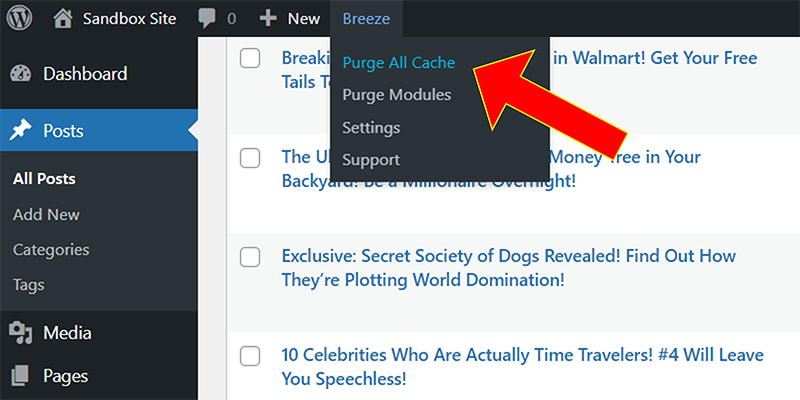
The Breeze menu button is positioned towards the left of the top bar in the WordPress dashboard. To clear the cache, click on the Breeze menu button, then select the “Purge All Cache” option from the dropdown menu. There is also a “Purge Modules” option available, but note that some modules may take longer to rebuild, so it’s best to perform this action during a low-traffic period.
How do I clear the cache with Cache Enabler plugin?
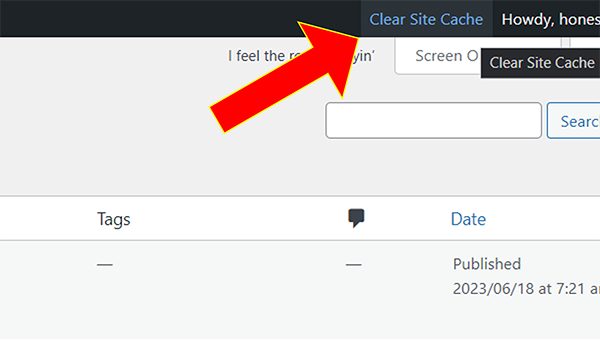
The Cache Enabler button is located towards the right side of the top bar in the WordPress dashboard. It’s a simple process, just click the button to clear the cache. There is no dropdown menu or additional options to navigate through.
How do I clear the cache with Cachify plugin?
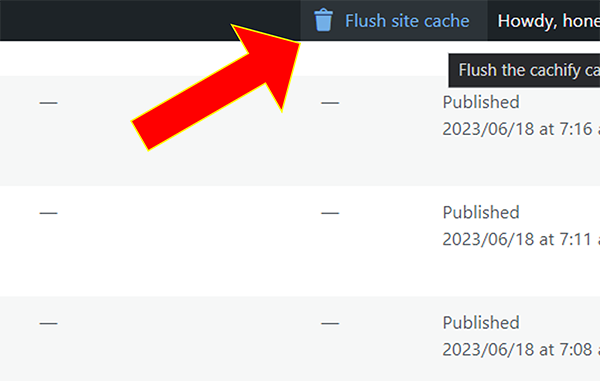
Similar to Cache Enabler, Cachify offers a button in the top bar of the WordPress dashboard. Click the button to clear the cache without any additional steps.
How do I clear the cache with Cache Comet plugin?
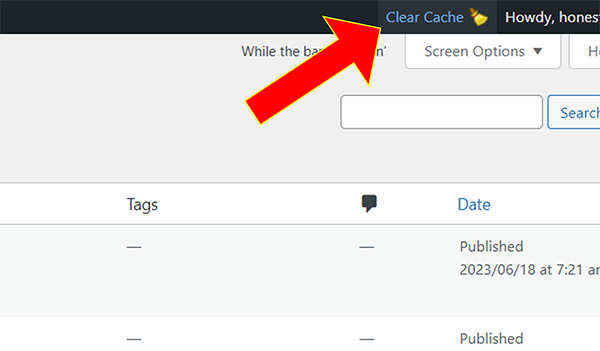
Just like the previous two plugins, Cache Comet provides a button in the top bar of the WordPress dashboard. Click the button to clear the cache quickly and easily.
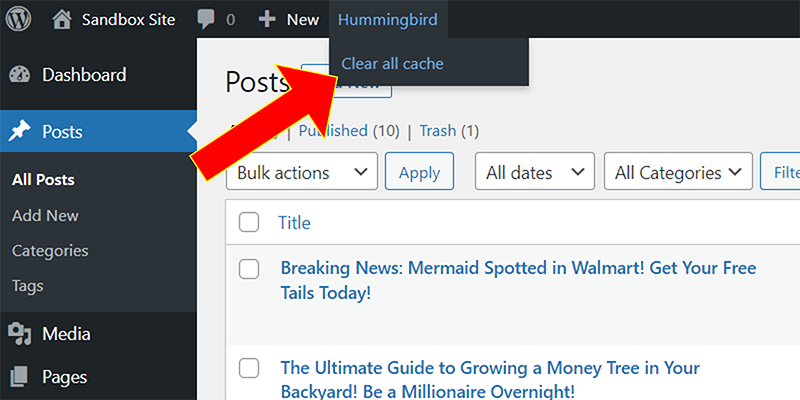
How do I clear the cache with Hummingbird plugin?
Hummingbird keeps it simple with a button near the left side of the top bar in the WordPress dashboard. When you click the button, you’ll find only one option in the dropdown menu. Select that option to clear the cache.
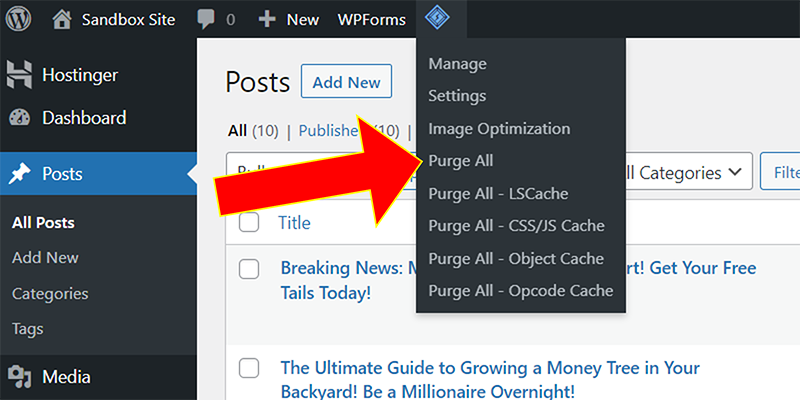
How do I clear the cache with LiteSpeed plugin?
In the top bar towards the left, you’ll find the LiteSpeed button. Click on it, and you’ll see several options. To clear the cache, choose the “Purge All” option. Please note that the “Purge All” button will clear everything except critical and unique CSS, as well as LQIP.
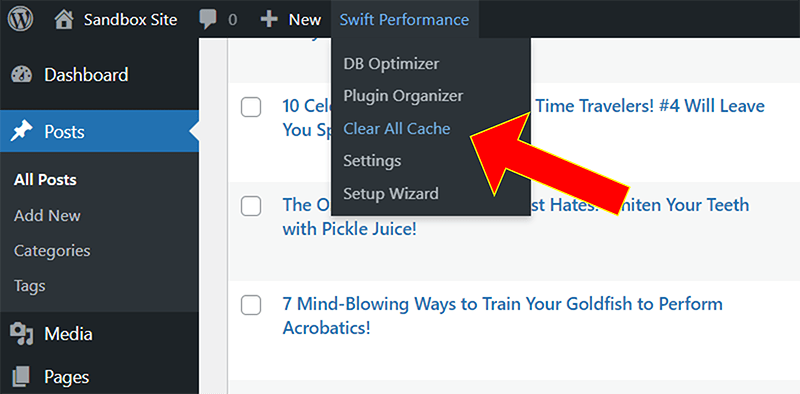
How do I clear the cache with Swift Performance plugin?
Also located in the top bar towards the left, Swift Performance offers various options. Simply click on the “Clear All Cache” button to clear the cache.
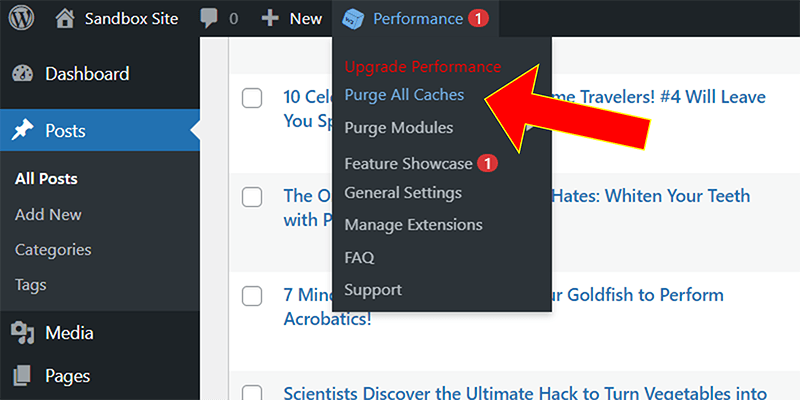
How do I clear the cache with W3 Total Cache plugin?
Positioned in the top bar towards the left, W3 Total Cache provides multiple options. Just click the “Clear All Cache” button to clear the cache effortlessly.
How do I clear the cache with WP Fastest Cache plugin?
Like the other cache plugins, WP Fastest Cache resides in the top bar towards the left. Click on the first option and select “Clear All Cache” to clear the cache.
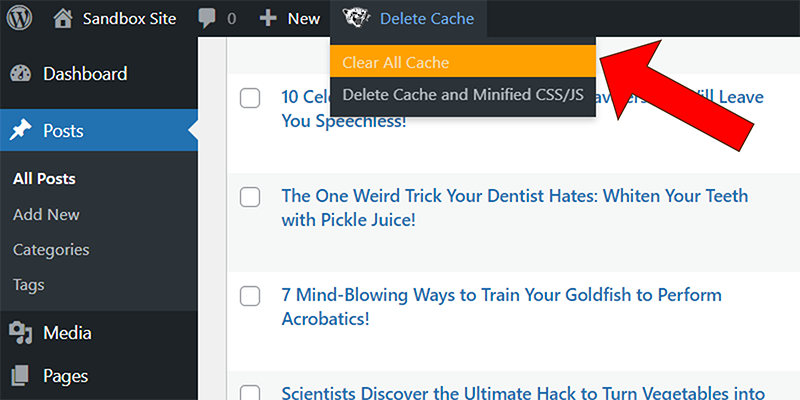
How do I clear the cache with WP Optimize plugin?
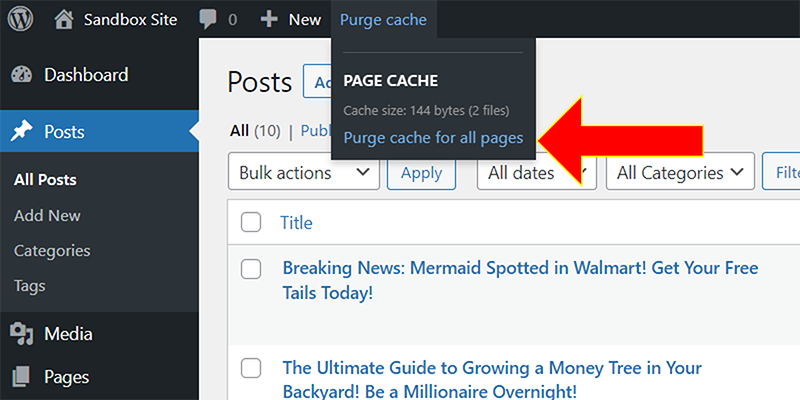
If you are using WP Optimize, the “Purge cache for all pages” is the only option found in the “Purge cache” menu dropdown.
How do I clear the cache with WP Super Cache plugin?
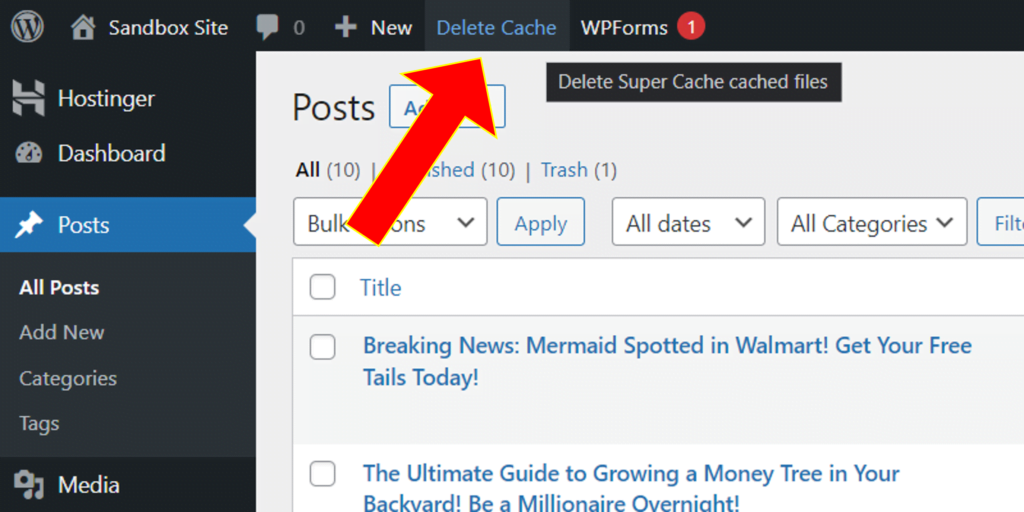
WP Super Cache is another plugin that only takes one button press to clear the WordPress cache. Look for the “Delete Cache” button in the left half of the top bar.
How do I clear the cache with WP Rocket plugin?
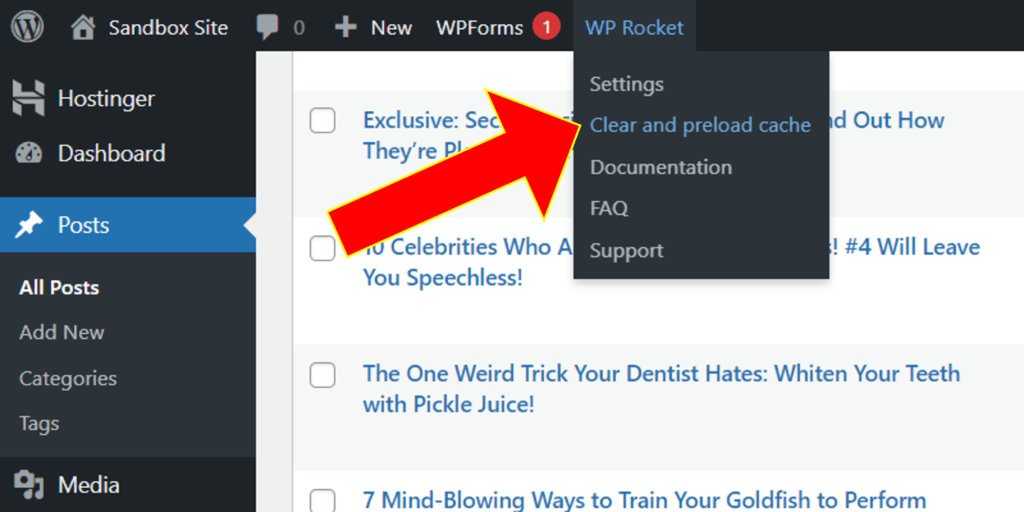
WP Rocket‘s button can be found in the left half of the top bar. Locate the WP Rocket button and click “Clear and Preload Cache” to clear the cache.
How do I clear the cache with Cloudflare plugin?
If you’re using Cloudflare either as a standalone cache manager or in conjunction with one of the above plugins, you can clear its cache too. However, it’s recommended to clear other caches first before clearing Cloudflare’s cache.
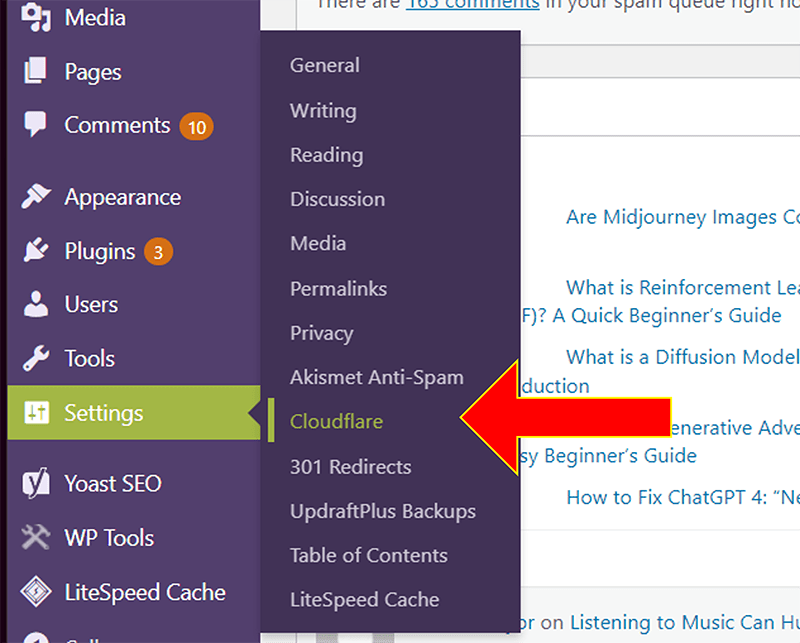
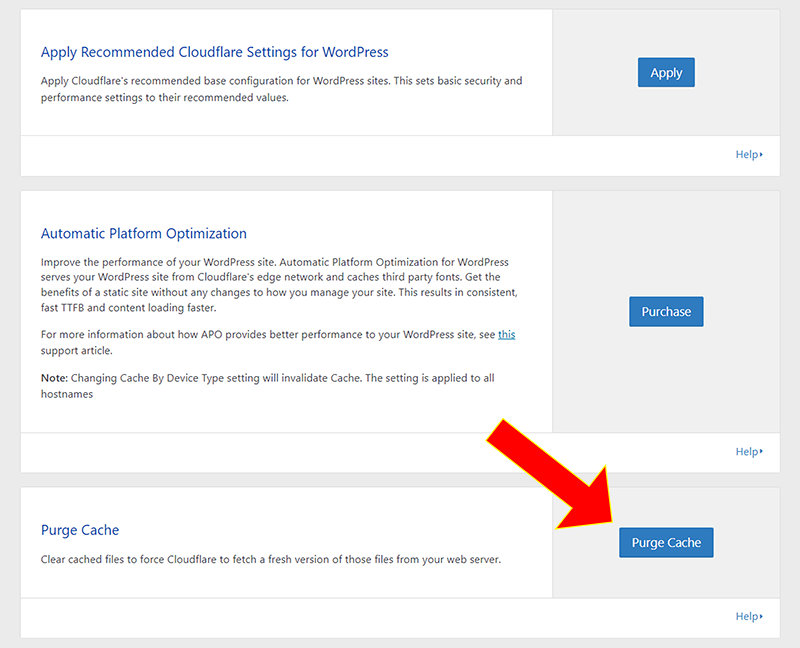
To clear the Cloudflare cache, go to the settings, click on Cloudflare, and then select the “Purge Cache” button.
Takeaway
Clearing the cache on your WordPress site is an essential step to ensure your website reflects the latest changes and optimizations. We’ve covered the most popular cache plugins and their respective methods for clearing the cache.
If your cache plugin or specific issues were not addressed, please leave a comment, and we’ll be glad to assist you. Keep your website running smoothly by refreshing your cache and stay tuned for more helpful articles on WordPress optimization.
Happy caching!


